Application Overview
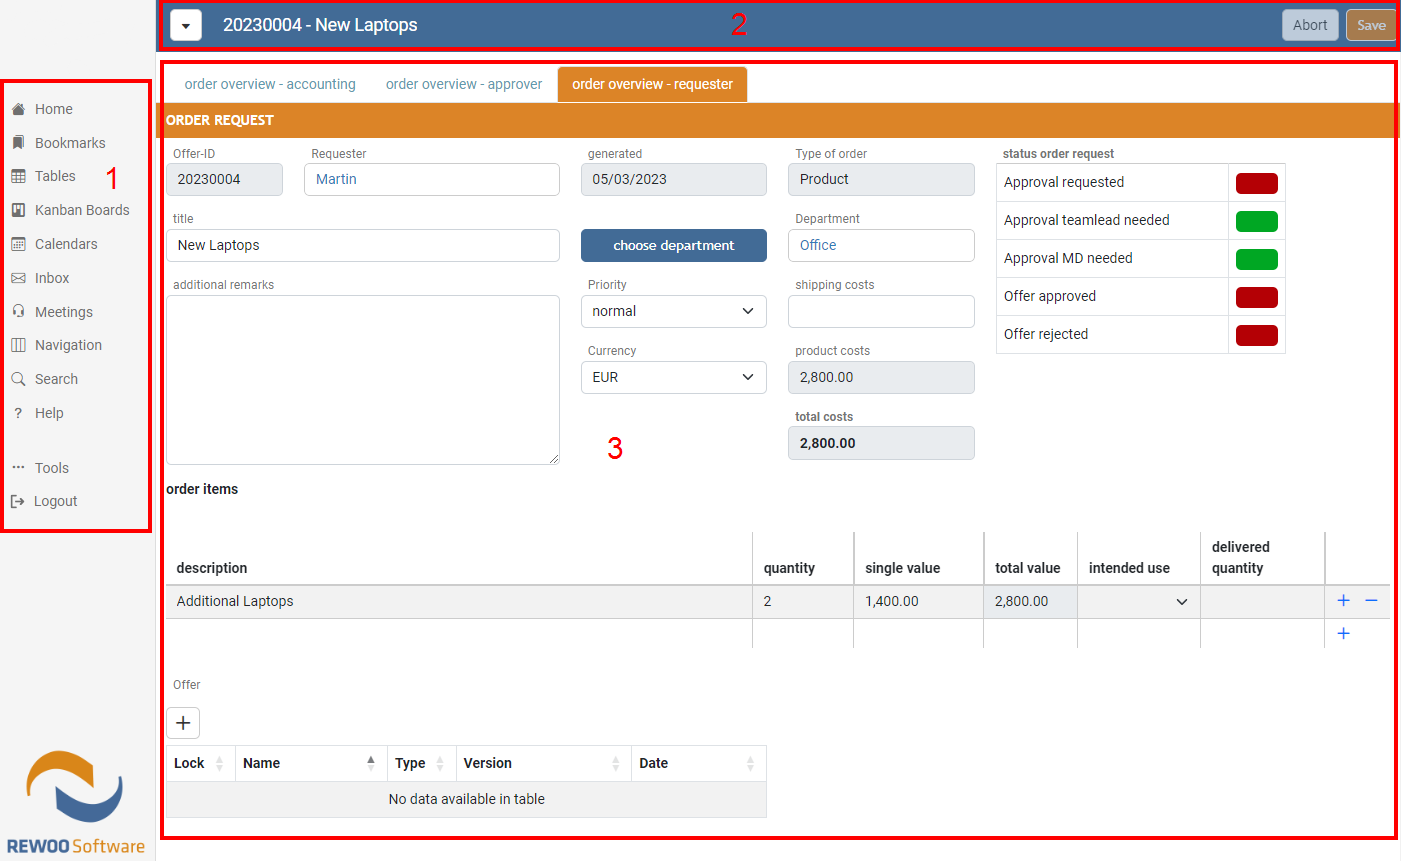
REWOO Scope client is divided into three areas:
Main Menu
At the top of the main menu (1) you can find three buttons:
- Home - Link to your personal startpage. The startpage is shown after the login and can be changed by the user.
- Bookmarks - List of all bookmarks saved by the user.
- Preferences - Opens the user preferences.
Instead, administrators will see four buttons to quickly switch between the application, the Designer, Account Management and the Admin Panel.
The main menu contains the following items, depending on the user permissions. Some of these menue items can be disabled in the global configuraion of your REWOO Scope solution.
- Data sheets - Opens the navigator.
- Tables - Opens the list of all available table views and filtered views saved by the user.
- Kanban Boards - Opens the list of all available Kanban boards. If only one board is available it will directly open the board.
- Calendars - Opens the list of all available calendars. If only one calendar is available it will directly opens the calendar.
- Inbox - Access your REWOO Scope internal inbox.
- Meetings - Click here for the calendar for video conferences.
- Search - Opens the global search menu.
- Help - Opens a customizable help page.
- Tools - Opens a sub menu with various options.
- Logout - Logout of the current user.
Home
Clicking on the home Link in the main menu opens your personal startpage. The startpage can be changed by using the form menu.
To reset the startpage to the default page you can open the user preferences and select "Default" from the list of options.
Bookmarks
Any datasheet or table view can be saved as a bookmark by using the form menu. As soon as there is at least one bookmarks available the Bookmarks menu entry in the main menu will appear. Clicking on the menu entrie opens a list of all saved bookmarks.

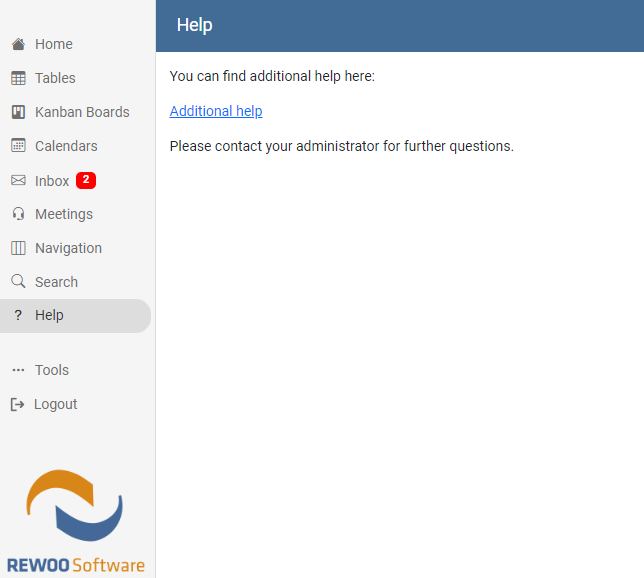
Help

The Help page can be used to add additional information for your users.
The page can be customized by any admin or power user.
Menu Bar
In the Menu Bar (2) you can find the following items:
- Form menu - This button opens the form menu with multiple form actions.
- Abort/Save - Buttons to abort or save form changes.
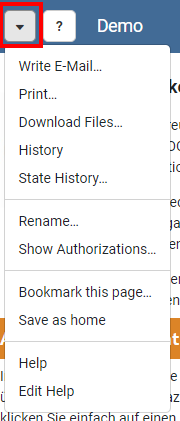
Form Menu
Every form includes a separate form menu which can be opened by clicking the menue icon:

More details about the form menu can be found in chapter 2 Forms/Datasheets
Forms/Datasheets
Forms/Datasheets (3) show the layout and content defined by the modeling user. Detailed information about forms can be found in chapter 2 Forms/Datasheets.